
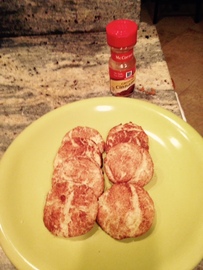
 I think I have been making Snickerdoodles for more than 50 years. This tried and true family favorite is often requested and always a hit at any gathering. The soft, smooth inside and the cinnamon/sugar outside is the perfect combination for eating by itself or with a cup of tea. My husband is a "dunker" so these always end up in his coffee cup. Ingredients: 1/2 cup butter (softened to room temperature) 1/2 cup Crisco (I use butter flavored but either one is fine) 1 1/2 cup granulated (white) sugar 2 eggs 2 3/4 cup flour 2 teaspoons Cream of Tarter (this is important so don't leave it out!) 1 teaspoon Baking Soda 1/4 teaspoon salt 1/2 cup granulated sugar 1 Tablespoons (or more) of ground cinnamon (I like lots of cinnamon!) Directions:
Put your butter, Crisco, sugar and eggs into a stand mixer or beat with a hand held mixer until the batter is very pale and fluffy (usually 3 to 5 minutes or more) Mix all the dry ingredients into a bowl and stir so everything is incorporated. Then slowly add to the butter/sugar mixture about a third of the mixture at a time. Mix until completely blended and refrigerate for 30 minutes or until the batter is cool. While the batter is cooling, take the 1/2 cup sugar and cinnamon and mix in a bowl. Once the batter is ready, drop by rounded teaspoons into the cinnamon mixture and coat evenly. Place coated dough onto cookie sheets lined with parchment or silicone mats (for even baking). Bake at 400 degrees for 9 to 11 minutes (I bake mine for 7 minutes than rotate the pans and bake another 3 minutes so they cook evenly.) Cook cookies for 1 minute on the pan before you move them to a wire rack to cool completely. I usually get about 5 dozen cookies, but I make mine small for the salon clientele. If I was making them for friends and family I'd make them bigger and get about 3 dozen out of this recipe. Enjoy!
0 Comments
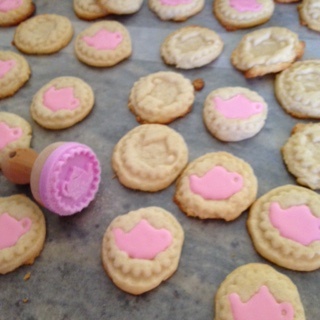 I have to admit that I'm a cookie cutter junkie and recently I've added a few cookie "stamps" to my collection. Recently I purchased a teapot cookie stamp which I used with my favorite sugar cookie recipe - White Velvet Cookies. I left most of the cookies just the way they come out of the oven, but I did fill a few of the teapots with royal icing and they looked great on a platter. Enjoy! Ingredients for White Velvet Cookies 1 pound (4 sticks) butter, softened to room temperature 1 8 oz package of cream cheese, softened at room temperature (not lowfat cream cheese) 2 cups white granulated sugar 2 egg yolks (save the whites for the Royal Icing) 1 tsp vanilla 4 1/2 cups flour 1/2 cup granulated sugar reserved (see note) Royal Icing (optional) Directions: Using a stand or hand mixer beat the cream cheese, butter and sugar for 5 to 7 minutes until light and fluffy. Add the two egg yolks (no whites!) and mix for another 2 minutes. Add the vanilla and the flour (1 cup at a time) until fully incorporated. Chill dough for at least 1 hour, overnight is fine. When you are ready to bake, preheat the over to 375 degrees and line your baking sheets with silicone mats or parchment paper. Roll the dough out (about 1/3 of the dough at the time, keep the dough you are not using in the refrigerator) to about 1/2 inch thickness and cut with any cookie cutter. Place on the cookie sheet and bake for 12 - 14 minutes or until the edges of the cookie turn golden brown. Note: Place about 1/2 cup granulated sugar on a plate and dip the cookie cutter into the sugar before you push it into the dough. This helps the dough release from the cookie cutter. You need to do this step each time whether you use a traditional cookie cutter or a cookie stamp. Remove from oven and let cool on cookie sheet for 1 minute then transfer to a wire cooling rack. Optional Royal Icing:
I like Royal icing for decorated cookies because it dries hard and you can stack your cookies. If you use canned frosting or make buttercream, then the cookies tend to smear. 4 cups Confectioners Sugar (aka Powdered Sugar) 1 tsp. vanilla (or lemon flavoring is good too!) 1 egg white (no yolk or the icing will not set up) - You can use one of the egg whites reserved from the above recipe 1/4 to 1/2 cup water Food coloring (optional) Using a hand or stand mixer put the sugar, vanilla and egg white into the mixing bowl and beat on high. Slowly add the water 1 tablespoon at a time until you get the desired consistency. You will want the icing to be slightly runny so that it spreads on its own into the cookie stamp mold. If the icing is too thick, simply add 1 tbsp. at a time of more water until you get the right thinness. Add food coloring if desired. Place the Royal Icing in a piping bag or a ziploc baggie (cut off one tip) and carefully fill the cookie stamp impression. The photo above shows some cookies filled and some not. But both are delicious! 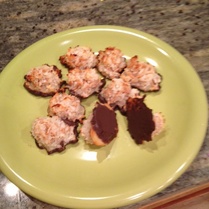 One of the easiest coconut macaroon recipes can be found on the back of a can of Eagle Bran Sweetened Condensed Milk. All it takes is the Eagle Bran and coconut. Although this is a great recipe by itself I'm often tinkering with recipes to see what I can do to make them a little different...and maybe better. In this version I added crunchy chow mein noodles and then dipped the bottom into melted chocolate. Yum! Ingredients: 1 can Eagle Bran Sweetened Condensed Milk (not evaporated milk) 1 bag (14 oz) Coconut flakes (unsweetened is fine) 1 cup crunchy Chow Mein noodles (I crush these up a bit in a zip loc baggie before using) 1 12 oz. bag of Wilton's (or other brand) chocolate melting wafers (milk chocolate or dark) Directions:
Once the cookies are completely cooled you can melt the chocolate wafers in your microwave (glass bowl works best). Set timer for 1 minute, then stir and microwave for additional 30 seconds or until fully melted. To coat the bottom of each cookie, simply dip the bottom of the macaroon into the melted chocolate and carefully scrape off any excess before placing on wax paper to fully set up. Makes about 3 dozen. |
GrammatlcGrammatlc bakes all the cookies for the clients at Split Ends Hair Studio (to visit the salon website, click the button above). She also bakes sweet treats for friends and family. Enjoy the recipes! Archives
December 2017
Categories |
 RSS Feed
